Building Runs
Metal | Wood
I have experimented in building cages throughout the years, eventually I paid to have all wire runs shipped in when another breeder went out of business. Like the saying goes; 'You get what you pay for!'
I've built many wooden cages but few wire ones. One should ideally have shears and a wire bender/cutter (large, upright machines) when undertaking a large quantity of cages. Then you need to decide if it is cheaper to buy custom cages or take your time to build them.
 Here's how I went about building my own breeder runs in Jan 2009;
Items used for this project;
- 3 Shelving Units $80
- 4 - 10' rolls of 1 x 1/2"x 30" hardware cloth. $70
- 2 - 25' rolls of 1/2" x 1/2" hardware cloth (not necessary) $39
- Metal shears from Harbor freight - $60
- 50' roll of 10" aluminum flashing - $37
- 3 sheets of 4'x8' Tileboard - $52
- Door Guards - $28
- Rings + Pliers - $40
- Drill
- Tape Measure
- Wire cutters (hand)
- Needle nose pliers
- "Hotwire" (fencing wire)
- Screwdriver

Found some cheap steel shelving. This cuts down on the amount of wire I'll need, gives me stability and a solid surface for pans if I go that route. The cheapest ones I found were at Lowe's for ~$24 each. Dimensions 36" W x 60" H x 18"D with 5 shelves.
Assemble shelving. These were so cheap that they couldn't stand up on their own and required a buddy to help due to warpage. They're rated for 1500lbs... if they could stand up. It's hard to see, but I've flipped the shelves upside down giving a 1" lip. I chose to not use pans due to cost and purchased a shop vac to use instead. An 18" x 18" x 5" deep pan would've set me back $32 per cage. Needing 30 of them, the largest industrial shop vac I could find was far cheaper.
 Mount the tileboard. I had it cut at Lowe's, it is very flimsy and difficult to restrain while cutting. It's a lot like cardboard, very light but waterproof on one side. I used the screws and bolts that came with the shelves to secure it. I then measured out my panel placement and drilled holes in the metal and tile board. At this point your shelves should be sturdy enough to stand upright, but be careful in lifting - I bent the legs on mine. (Hey, they were cheap!)

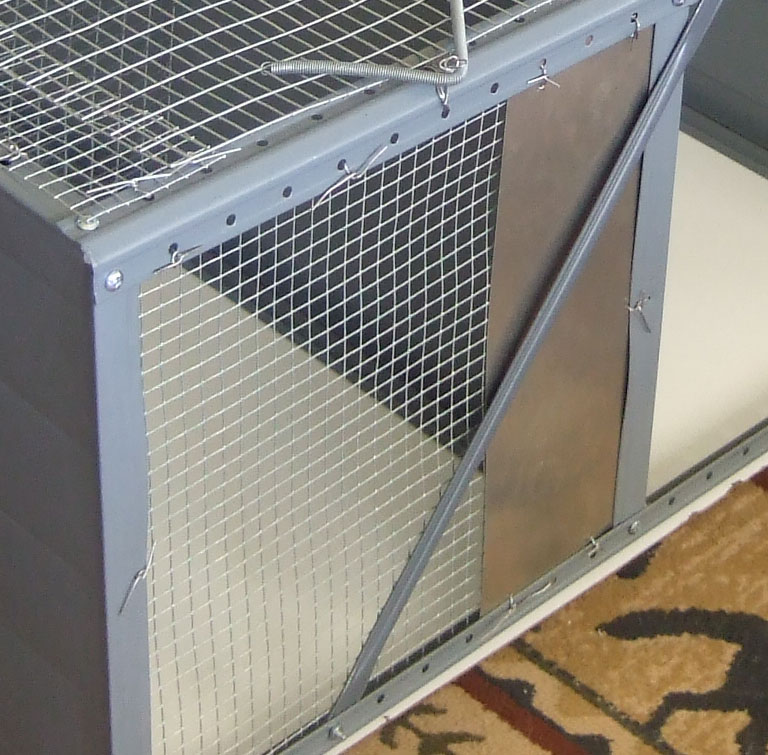
Start cutting your wire. This photo is of the second tower I built, three holes to a cage. 12 x 18 x 18 for a total of 12 cages. I cut the panels individually for each part and wired them into the drilled holes. Click on the photo to see a closeup of the wiring.
I added the flashing as I went, wiring both the side wire panel and the flashing at the same time. This is the first set I built, 8 breeder holes, 18 x 18 x 18.

Once assembled I cut and installed shelving with wood screws and washers.

I used some old springs for the doors. Below is the completed breeder cage with feeders and watering system.
Total time spent on these was around 15 hours per tower working alone. 12ish assembly and 3 getting the waterers, feeders, shelves, etc. wrangled. Cost was roughly $13/cage for 32 cages, does not include the watering system, feeders, pop holes or door springs. If I were to do this again, I'd get sturdier, square shelving. This would allow me to cut and attach one large piece for the sides. I would also use all 1 x 1/2" wire. These cages only lasted about two years. Chinchillas have very acidic urine and it ate through the shelves in a very short period of time.
Wood breeding cages
In Spring 2011 I decided to build sturdier runs. Due to lack of other types of wood I ended up using 1/4" plywood. I do not recommend using it - you want to use the smoothest possible materials so they won't chew the walls. The cages were specifically designed to get the maximum usage out of a 4 x 8" sheet. They took me over a month to put together in my spare time. The doors were given to me by a rancher and the rest of the wire was leftover from my original run project. I was out casters, wood, and a lot of time.
They did turn out very nice and uniform. My only regret is not getting pans made and steel plating the edges. Pans for this unit would run $300 before freight. Chins can and will chew the groove the run sits in. I've had to slip metal in there and flatten it to the wall to keep them from chewing through. Would have saved me a lot of time to do it while I was assembling.


After a year of using these cages I was offered the opportunity to get a large quantity of heavy duty wire runs from a breeder that was retiring. They are uniform, sturdy and much easier to use than the wood ones. They were built in the 1950's and look brand new so I expect to get many years out of them.